Durvasasana (Durvasa's Pose) – Standing, Balancing Yoga Guide
Introduction
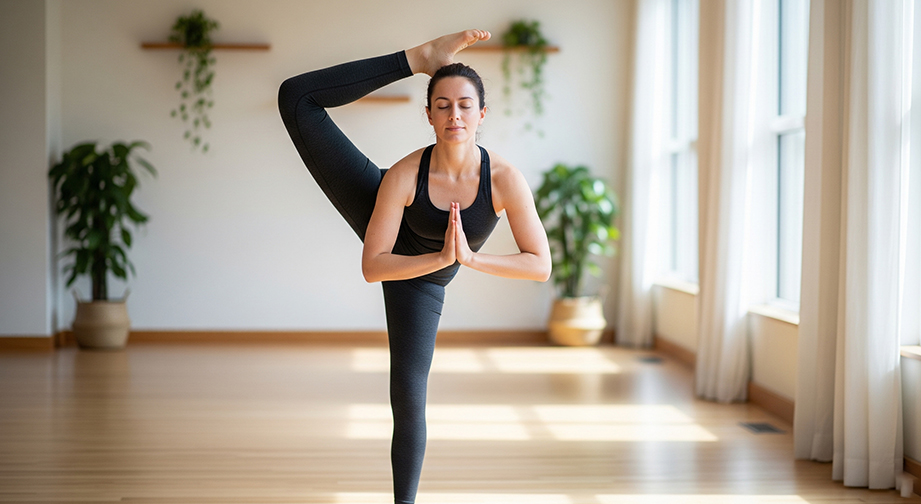
Durvasasana, known in Sanskrit as Durvasasana (Durvasa’s Pose), is a remarkable standing, balancing yoga asana that melds strength, flexibility, and intense focus. The name honors the sage Durvasa and literally means “the posture of Durvasa.” Its essence? Unshakeable balance and calm amidst challenge.
If you've ever dreamed of bringing both your mind and body into perfect steadiness—even when life wobbles—this pose is for you. Feeling stiff or restless after a long day? Durvasasana can be your gateway to a sense of grounding and new possibility.
Step-by-Step Guide: How to Practice Durvasasana
- Start in Tadasana (Mountain Pose):
Stand with feet together, grounding evenly through both feet. Inhale deeply, feeling your spine lengthen upward.
- Shift Your Weight:
Slowly transfer all your weight onto your left leg. Keep your left leg strong and straight. Take a breath, feeling stable and balanced. Exhale.
- Lift the Right Leg:
With your right hand, reach down and gently grasp your right ankle. Inhale. Exhale as you bring your right foot up, tucking it close into your left inner thigh or, for more flexibility, place the ankle behind your head.
(Beginners: Start with the foot high up on the calf or thigh, not behind the head!)
- Find Balance and Lengthen:
Press your standing foot into the mat. Keep the spine long, core lightly engaged. Find a drishti (gaze point) in front of you to help balance. Inhale here.
- Optional – Prayer Hands:
If steady, bring hands together at heart center (Anjali Mudra). Breathe slowly and steadily.
- Hold:
Stay for 3–5 slow breaths (about 15–30 seconds), then gently release and repeat on the other side.
- Breathing: Inhale on preparation and lengthening; exhale as you lift and enter the posture. Maintain smooth, slow breaths throughout.
- Duration/Rounds: 1–2 rounds per side or as comfortable.
- Modifications for Beginners:
- Use a wall for support or balance.
- Keep the lifted foot on the inner shin or thigh (not behind the head).
- Hold a block with your free hand if balance is shaky.
- Intensifications:
- Slowly work the foot higher, eventually behind the head for advanced flexibility.
- Lift arms overhead for an extra balance challenge.
Alignment & Safety Tips
- Key Alignment:
- Keep the standing leg straight but micro-bend the knee to avoid hyperextension.
- Engage the core and lift through the crown of your head.
- Open the chest and keep shoulders relaxed.
- Hips face forward, not twisting out to the side.
- Common Mistakes:
- Hunching or rounding the back—focus on lengthening the spine.
- Locking the standing knee.
- Forcing the lifted foot too high—respect your body’s limits.
- Holding the breath—keep it smooth and even.
- Safety Precautions:
- Avoid if you have hip, knee, or lower back injuries.
- Not recommended during pregnancy.
- Warm up hamstrings and hips before attempting.
Benefits of Durvasasana
Physical Benefits
- Builds leg, core, and ankle strength
- Increases hip and hamstring flexibility
- Improves body balance and overall posture coordination
- Stretches the chest and shoulders (with variations)
Mental Benefits
- Encourages deep concentration and presence (mindfulness)
- Reduces stress by grounding mental energy
- Develops patience, persistence, and emotional resilience
Energy & Chakra Connection
- Connects to the Root Chakra (Muladhara) for grounding and stability
- Opens the Sacral and Solar Plexus Chakras for confidence and creativity
Contraindications
- Those with severe hip, knee, or lower back injuries should avoid.
- Pregnant practitioners should skip this pose due to balance risk.
- If you feel any pain (not just stretch), come out immediately.
- Alternatives: Try Tree Pose (Vrikshasana) or Standing Hand-to-Big-Toe Pose (Utthita Hasta Padangusthasana).
Beginner’s Tips & Variations
- Props: Use a wall for support. Place a block under your hand if reaching the foot is difficult. A yoga strap around the foot can help lift the leg higher with less strain.
- Gentle Variations: Keep foot lower, work gradually on flexibility. Practice balancing with hands on hips before lifting the foot higher.
- Advanced Variations: Bring foot behind the head while keeping chest upright. Try hands overhead for balance or reach arms out wide.
How to Include Durvasasana in Your Yoga Flow
- Best Placement:
- Main practice (after warming up), as a balancing and hip-opening highlight.
- Pairs Well With:
- Standing Forward Bend (Uttanasana)
- Tree Pose (Vrikshasana)
- Triangle Pose (Trikonasana)
Mind-Body Connection
As you practice Durvasasana, focus on mindfulness and self-acceptance. Notice subtle shifts in balance—how your body compensates, how thoughts arise and fall away. This asana can be a moving meditation, helping you feel steadier inside and out. Energetically, it awakens your root and solar plexus chakras, inviting both confidence and steadiness.
Summary Box
Asana Name: Durvasasana (Durvasa's Pose) / ??????????
Level: Advanced (beginners welcome with variations!)
Focus Areas: Core, hips, hamstrings, ankles, balance
Duration: 15–30 seconds per side
Best Time to Practice: Morning or as part of your main yoga session
FAQs on Durvasasana (Durvasa's Pose)
Q: Can beginners practice Durvasasana?
A: Yes! Start with gentle variations (foot at the calf/thigh, use a wall/strap) and work up slowly.
Q: How do I avoid falling?
A: Find a focal point (drishti), engage your core, and don’t hesitate to use props or a wall for support.
Q: What if I can’t get my foot high?
A: Flexibility takes time—start low, keep breathing, and progress at your own pace.
Q: Should I feel pain?
A: No! Never force your body. Only mild stretching sensations, never sharp pain.