Bhujapidasana (Arm-pressing Posture) – Step-by-Step Guide, Benefits & Tips
Introduction
Bhujapidasana, or the Arm-pressing posture, is a playful but powerful yoga asana that tests both balance and arm strength. In Sanskrit, “Bhujapidasana” blends “bhuja” (arm/shoulder), “pida” (pressure or stress), and “asana” (posture) — giving us the "Arm-pressing Pose."
Essence: This asana is all about balance, core strength, and feeling grounded.
Wondering if you're the type who feels stiff after working at a laptop all day, or maybe struggles to find that sense of stability in your body and mind? Bhujapidasana is a great pose to help you build both strength and core confidence!
Step-by-Step Guide for Bhujapidasana
- Start in a standing forward fold (Uttanasana).
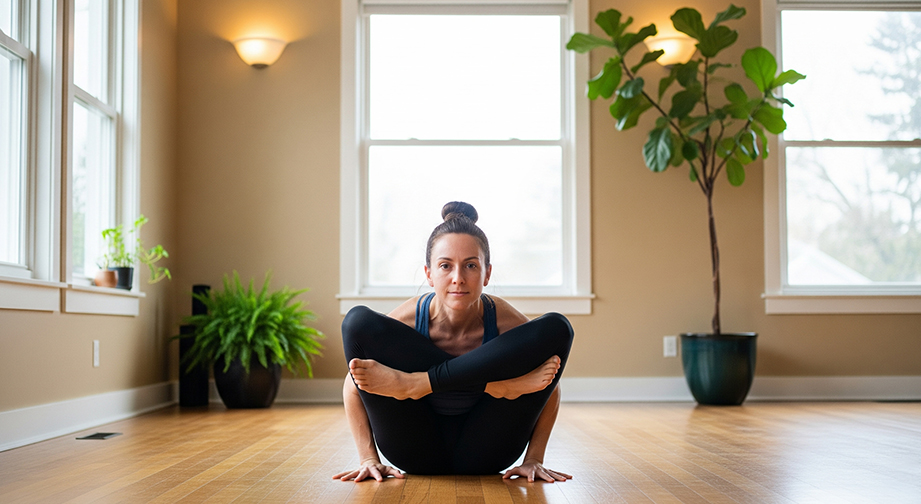
Place your feet just a little wider than hip-width. Bend the knees deeply and squat down, keeping your heels on the mat if you can.
- Slide your shoulders and upper arms behind your knees.
Wiggle one shoulder at a time deep under your thighs, bringing your hands to the floor just behind your feet, fingers pointing forward.
- Press your arms and thighs together.
Squeeze your knees gently against your upper arms.
- Spread your fingers for a strong base. With a deep inhale, press into your palms.
- Lift your feet off the ground. On an exhale, start to shift your weight into your hands, gently lifting one foot, then the other, crossing your ankles in front of you.
- Hold and Breathe. Keep your elbows bent, chest open, and core strong.
- Inhale: Lengthen the spine, lift the chest.
- Exhale: Hug the thighs and arms together, draw the belly in.
- Stay for 3-5 breaths. (Or about 15–20 seconds. Rest between rounds, and repeat 2–3 times if you like.)
- To release: Gently lower your feet back to the mat on an exhale, uncross the ankles, and slowly stand up.
Modifications for Beginners:
- Place yoga blocks under your hands for extra height and support.
- Keep your toes on the ground and work on lifting just the heels at first.
- Practice just squatting with your arms around your legs to build flexibility.
For Advanced Practitioners:
- Straighten the arms fully to intensify the posture.
- Work on transitioning into other arm balances like Tittibhasana (Firefly pose).
Alignment & Safety Tips
- Press down evenly through the whole hand. Don’t let your palms lift.
- Draw the chest forward to avoid rounding the back too much.
- Keep elbows bent and pointing back, not to the sides.
- Engage your core and inner thighs for stability.
- Common Mistakes:
- Placing hands too far forward — keep wrists under shoulders.
- Sinking the chest — keep shoulders broad, neck relaxed.
- Forcing the lift — build strength and flexibility gradually.
- Safety:
- Avoid if you have recent wrist, shoulder, or lower back injuries.
- Not recommended during pregnancy.
- If you feel sharp pain or pinching anywhere, come out of the pose gently.
Benefits of Bhujapidasana
Physical Benefits:
- Builds arm, shoulder, and core strength.
- Improves hip flexibility.
- Enhances posture and balance.
- Strengthens wrists and upper back muscles.
Mental Benefits:
- Improves focus and concentration.
- Relieves mild stress and restlessness.
- Builds self-confidence through mastering balance.
Energy/Chakra Connection:
- Stimulates the Manipura (Solar Plexus Chakra)—linked with confidence, willpower, and inner strength.
Contraindications
- Wrist, elbow, or shoulder injuries.
- Recent hip or lower back issues.
- Pregnancy.
- High blood pressure (check with your doctor).
Safe Alternatives:
- Malasana (Garland Pose) – a deep squat for hips
- Bakasana (Crow Pose) – another accessible arm balance
Beginner’s Tips & Variations
Using Yoga Props:
- Blocks under hands for extra lift or wrist support
- Wall for balance (practice facing a wall for security)
- Rolled towel under heels if you can’t keep them down
Gentle Variations:
- Lift just one foot at a time, or just the heels.
- Work on arm and hip flexibility with preparatory poses.
Advanced Variations:
- Try straightening the legs forward (Firefly Pose).
- Transition fluidly from Bhujapidasana into Chaturanga or jump back to plank.
How to Include Bhujapidasana in a Yoga Flow
- Best as a main practice or "peak pose" in your sequence.
- Warm up first: try Malasana (Garland), Plank, and Down Dog.
- Pairs well with:
- Utkatasana (Chair Pose) – for warmed leg & core muscles
- Bakasana (Crow Pose) – to build toward Bhujapidasana
- Chaturanga Dandasana (Low Plank) – great arm/core follow-up
Mind-Body Connection
Practicing Bhujapidasana is a lesson in staying centered and focused, even when life (or gravity!) tries to tip you over. Breathe deeply, notice what comes up in your mind as you balance, and let yourself feel both strong and supported by your own body.
This pose energizes the solar plexus chakra (Manipura), inviting you to explore confidence, willpower, and personal power.
Summary Box: Bhujapidasana (Arm-pressing posture)
- Asana Name: Bhujapidasana / Arm-pressing Posture (Sanskrit: ?????????)
- Level: Intermediate
- Focus Areas: Arms, Shoulders, Core, Hips
- Duration: 15–30 seconds per round, repeat 2–3 times
- Best Time to Practice: Morning or early evening, when the body is warmed up
FAQs about Bhujapidasana:
- Q: Is Bhujapidasana suitable for beginners?
A: Yes, with modifications! Use props, don’t worry about fully lifting the feet at first, and focus on form.
- Q: How can I avoid wrist pain?
A: Warm up wrists, spread fingers wide, and consider a folded blanket under the heel of hand for padding.
- Q: What should I do if I can’t balance?
A: Practice with feet on a block, or work with one foot lifted at a time. Patience is key!